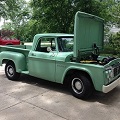
My truck is a conglomeration of a few vehicles, so the install is very specific to my application.
The specs are my truck are 5.2 Magnum, radiator,and trans out of a 2000 Durango. This was my first obstacle. The 5.2 obviously comes with A/C. My original plan was to just use a factory compressor for the Durango, but after researching it and finding out that every compressor is different I decided to use one designed for the Vintage Air set up. First lets start with the kit that I decided on. After alot of research and pricing I decided on the Vintage Air Gen II Super cooler kit. I used a company out of Florida to order the kit because a friend had ordered from them and was happy. So off we go!!
First thing I did was figure out where to install the condesor.
After deciding where I wanted it I built a lower bracket out of angle iron to mount underneath the core support

This is where that bracket bolts

Here is the condenser mounted. I used spacers on the top to bring it out passed the recess in the core support


Next was to come up with a plan for the ac compressor. The universal brackets that I got with the kit are pretty ridiculous. I ended up building a plate to bolt to the 5.2 original ac bolt holes and cutting down the brackets to work.


Once the compressor was mounted it was time to find a belt. I assumed a standard ac belt would work, but I was wrong. The bracket moved the compressor up to much, so back to the drawing board. To make a long story short I figured out that a Dodge Viper ac delete belt would allow me to run the new compressor and eliminate the leaky power steering pump I wasn't using anyway.
Now the fun part, how to mount the evaporator under the dash. I built 3 brackets. Not a huge fan of where Vintage Air puts the mount holes, but it works. 1 bolt through the firewall and 2 to the dashboard. I had the remove the center dash support which I don't think is a big deal because the evaporator with brackets should support the dash. This where my picture taking fell apart. I also, ended up welding all the holes where my original heater was and bought a bulkhead to run the lines through the firewall.


I also eliminated the factory fan and found an electric one off a Pt cruiser that seems to fit pretty good. It's pretty cool because with the Trinary safety switch the fan will cycle on and off as needed.

Well that's pretty much it for now. Any questions just let me know if I can help. Sorry I fell short on the pics, but I can take any specific pics of anyone needs them.
With everything I'm in it about $1600. Well worth it in my opinion. It blows super cold and actually cools the entire leaky cab.