Painting Tail Gate Letters
-
cbody70
- Sweptline.ORG Member

- Posts: 321
- Joined: Wed Dec 31, 1969 6:00 pm
- City: Grimsby/ON
- Location: Grimsby, Ontario
- Contact:
Painting Tail Gate Letters
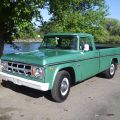
Been considering painting in the tail gate letters after Oscar came back from paint. Kind of like the low key appearance of body colour it now has but the white call out appearance has some appeal too. Has anyone attempted this job? What kind of masking tape/prep/paint? I don't want to screw up a decent paint job!
Fred - "Oscar" 1969 Fargo D200 Camper Special and "Nessie" 1970 Dodge Polara Convertible
-
Jims68
- Sweptline.ORG Pioneer

- Posts: 3126
- Joined: Wed Dec 31, 1969 6:00 pm
- City: Edgewater Park
- State: NJ
- Location: Southern New Jersey
- Contact:
I used "Rustoleum" paint... believe it or not. I used a Nice artist brush and I did not use any tape. However, if you do use tape go to an auto body supply store, and get some 3M FINELINE tape. This is especially made for striping. I did the edges of the DODGE letters and then filled in the center doing ONE letter at a time. If you need paint to do the letters, use a ENAMEL. This drys slowly and allows you to wipe off "mistakes". Yes... I did make mistakes but after wiping them off, I could start over. You can also get a special lettering/striping paint called ONE SHOT. That is available in many colors. GOOD LUCK!
Jim
Jim


Painting Letter's...
Get 1 Shot Lettering Enamel Paint (1/4 Pint at the most...it goes along way...),
small can of PAINT THINNER, 1 roll of 1/4" Blue Fine Line Tape (to mask the top & bottom of the letter's off with...) & a small MACK Lettering Brush (about a # 4...) & a clean soft rag, an old T-Shirt or Cotton Sock work's well!
Now, make sure that the paint job has dried for at least 1 Month before you paint the Letter's (if your paint job is dry on top & soft underneith, when you go to pull off the Tape, you will pull the paint up with it...you can check if it's not dry by pushing your finger hard on the LETTER, do it in a small area, & see if you leave a fingerprint, if you do then it's not dry yet).
1st: wipe all the Letter's down good with Thinner on a soft cloth, let dry (about 5 min).
2nd: tape off Top & Bottom of Letter's & rub Tape LIGHTLY down on side where your Painting.
3rd: "SHAKE PAINT UP GOOD" & when you remove the lid, stir up Paint with a Screwdriver or mixing stick.
4th: Use a small cup or spray can lid & fill with Thinner (your going to use this to thin out the 1 Shot Paint).
5th: Use an old Magazine or Telephone Book for a Palet.
6th: Now, dip your Brush into the Can of 1 Shot Paint about half way...now put your Brush on the Palet & stroke up & down to mix the Paint into your Brush, do this about 3 time's & then dip Brush into the Thinner the same way 1 Time & put your Brush on the Paint on the Palet & stroke up & down in the Paint & see how the Paint feel's (1 Shot Paint is kinda thick & need's to be thinned...this way is better then thinning the Paint in the can & save's you alot of Paint & one BIG MESS when you go to Paint the Letter's...the Paint, if thinned too much from the can, will run & you will have to clean up & start over again).
7th: Keep dipping & stroking Paint then Thinner until the Brush drag's thru the Paint smoothly without hesitating...now ALLWAY'S start Painting at the TOP of the Letter's & stroke side to side, you will feel the Paint Brush start to drag when you need more Paint. After you have painted your 1st Letter, then go over that Letter lightly (this is called "FEATHERING"...this will make the paint smooth out...1st got up & down then side by side, you will see what I mean!).
If you drip Paint, "DON'T FREAK OUT"...just use a small clean rag dipped in thinner (don't soak the rag in the Thinner...just put the rag over your finger & dip it in the Thinner) then wipe up the Paint & dry area with another clean rag!
After you have Painted all the Letter's, "SLOWLY" pull the Tape OFF at a 45 Degree angle pulling away from LETTER'S on Tailgate (PULL TAPE AT TOP DOWN & TAPE AT BOTTOM UPWORD'S).
If you make a mistake on a LETTER, just take a "DRY CLEAN RAG" & "PUSH THE PAINT BACK INTO THE AREA YOU ARE PAINTING"...if you try wiping the paint off along the edge of your LETTER, you will make a big mess! Now you can just Paint over that area & "FEATHER OUT THE PAINT" & it will look as good as the rest of the LETTER!
I know this because this is what I have been doing since I was 7 Year's Old...that will be 40 Year's now...along with Pinstriping & Air Brush! If you have anymore question's...e-mail me at; skull@ctaz.com "HAPPY PAINTING"..."SKULL"
"Let's Wake The Dead"...
***********************************
1967 D200 Sweptline
1964 D100 Utiline
***********************************
1967 D200 Sweptline
1964 D100 Utiline
-
CSS-Registry

- Administrator

- Posts: 3715
- Joined: Wed Dec 31, 1969 6:00 pm
- City: Gainesville, Florida
- State: FL
- Location: Gainesville, Florida
- Contact:
-
Grandpastruck

- Sweptline.ORG Member

- Posts: 9
- Joined: Wed Dec 31, 1969 6:00 pm
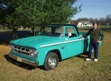
We recently had our tailgate letters painted. We went to a local guy who is a sign painter, and he did it freehand, in white, and only charged us $40.00 for doing it. Figured someone who does this type of thing all the time would be less likely to make a mistake, then us trying it ourselves. The autobody shop that did the rest of the truck said to take it there also.
Cool! That's a good price...don't ever waste your money on that vinyl crap  it is designed for "Temporary Use Only"...when that crap first hit the public, people thought it was the best thing...until they paid the price & within a few month's after they had it done, most of the letter's had fallen off & the rest had split & looked like crap! I have made so much money re-doing people's Sign's, Boat's, Race Car's etc., & I had a ball of vinyl the size of a Basketball within the first year!
  Stick with Hand Painting from a Pro...even if it cost alittle more!
  "SKULL"
"Let's Wake The Dead"...
***********************************
1967 D200 Sweptline
1964 D100 Utiline
***********************************
1967 D200 Sweptline
1964 D100 Utiline
Holy crap batman! You better call him this week!cbody70 wrote:Met a guy at a cruise night tonight that does pinstriping and signs. Said he'd do my letters for $25. I'll be calling him at the end of the month!
1967 Dodge D200 5.7 HEMI/5speed
1971 Dodge Challenger #'s 383/727
1974 Dodge D600 318 5+2
2003 Ram 2500 Cummins HO
1971 Dodge Challenger #'s 383/727
1974 Dodge D600 318 5+2
2003 Ram 2500 Cummins HO