Fuel gauge and temp would peg when I first got the truck, then nothing. Replaced the fuel gauge sending unit with a new one off eBay and verified the wire running to the gauge. Still nothing, but I figured the damage was done and lived with it. When oil started leaking from the oil pressure gauge supply line fitting and running off the edge of the lower instrument panel to drip on the floor and my foot, I figured it was time.
Pulling the cluster and blowing it apart enabled me to disassemble the temp and fuel gauges revealing sections of the fine wires inside the movements burnt and melted completely apart. Luckily a friend was able to find a couple of used gauges in his stash that we verified to work and I bought them. Years ago I read and saved an article in Mopar Action that detailed the replacement of the mechanical instrument voltage regulator with a small solid state IC and electrolytic capacitor. As result of the article I purchased a couple of sets of components including small heat sinks a short time later that i still had.
68 Camper Special Instrument rehab
-
Conductorblg
- Sweptline.ORG Member

- Posts: 41
- Joined: Wed Feb 16, 2022 7:15 pm
- City: Milwaukie
- State: OR
68 Camper Special Instrument rehab
- Attachments
-
- cluster unbolted and pulled far enough away to start removing connections
-
- oil pressure hose leaking at the factory crimp
-
- buss bar connection to the fuel gauge 12 volt supply post
-
- Camper Special wiring to the ammeter
-
- starting to remove fuel gauge and ammeter wiring
-
- ground wire (white) attachment, light socket and speedo cable disconnected
-
- panel housing laying on the bench
-
- back of ammeter and fuel gauges
-
- back of oil pressure and temperature gauges
-
Conductorblg
- Sweptline.ORG Member
- Posts: 41
- Joined: Wed Feb 16, 2022 7:15 pm
- City: Milwaukie
- State: OR
Re: 68 Camper Special Instrument rehab
The cluster slipped when removing it from the truck and I inadvertently touched the speedo needle causing the tip of it to scrape the face in an arc. One more thing to fix before reinstalling.
- Attachments
-
- back of ammeter showing buss bar and heat sink mounting voltage regular IC
-
- small existing hole was used to mount the heat sink beside the ammeter
-
- IC is mounted to heat sink and three individual prewired connectors are pushed on IC leads
-
- the complete IC assembly mounted to the housing
-
- IC connections to the distribution buss and surge capacitor grounded to the housing
-
- back of ammeter
-
- showing IC wire cooler codes
-
- masking off gauge faces to paint needles, note already scratched speedo gauge face from needle sweep
-
- needles repainted
-
- used replacement temp gauge
-
Conductorblg
- Sweptline.ORG Member
- Posts: 41
- Joined: Wed Feb 16, 2022 7:15 pm
- City: Milwaukie
- State: OR
Re: 68 Camper Special Instrument rehab
The speedo face scratch was repaired by spraying a little Rustoleum satin black into a lid from something and using the tiniest brush I could find to just fill in the scratch.
- Attachments
-
- the old burned out temp gauge, notice how much better shape the faceplate is
-
- back of the temp gauge
-
- IC wiring and the original blue wire connecting the fuel gauge to the temp gauge
-
- borrowed the battery from my generator to test voltages
-
- AN fitting silver soldered to the oil pressure gauge fitting for converting to a braided stainless line to the engine
-
- rewired panel, note buss bar disconnected from the fuel gauge
-
- rear of panel showing new component connections
-
- rear of panel from a different angle
-
- old gauge face attached to replacement movement with 2mm screws
-
- instrument panel with needles repainted before retiring speedo scratch
-
Conductorblg
- Sweptline.ORG Member
- Posts: 41
- Joined: Wed Feb 16, 2022 7:15 pm
- City: Milwaukie
- State: OR
Re: 68 Camper Special Instrument rehab
The Sun Super Tach cup is bolted to the top of the turn signal collar of the steering column. I drilled and tapped the collar for a #10 machine screw to mount it. I used the same Rustolium Satin Black paint on the cluster face plate as I did on the speedo face itself. Since these photos were taken a friend took pity and gave me a screaming deal on a perfect white steering wheel he had removed from a low mileage motor home to replace my far less than perfect one that was going to need major restoration.
- Attachments
-
- I lengthened harness for the panel light to make it easier to reassemble the cluster back into the dash
-
- Back together with everything working. Note the engine is idling at 800 RPM in the photo
-
Conductorblg
- Sweptline.ORG Member
- Posts: 41
- Joined: Wed Feb 16, 2022 7:15 pm
- City: Milwaukie
- State: OR
Re: 68 Camper Special Instrument rehab
It is very important to remove the connecting bar to the buss bar on the back of the ammeter from the post on the fuel gauge. Failing to do so will toast the gauge if the internal regulator is shorting out like mine did. Because the gauges work off 5 volts nominal, after the internal regulator fails you don't want to get 12 volts anywhere near that post on the back of the fuel gauge . I simply used a set of duck billed pliers to bend it straight up at 90 degrees clearing everything. I didn't, but painting it with liquid electrical tape is probably a good idea.
What a concept, having all the gauges working and being able to see the in-dash turn indicators (I detailed making those visible in another thread). I'm still not used to not having to keep a small can of gas with me just in case.
What a concept, having all the gauges working and being able to see the in-dash turn indicators (I detailed making those visible in another thread). I'm still not used to not having to keep a small can of gas with me just in case.
-
Conductorblg
- Sweptline.ORG Member
- Posts: 41
- Joined: Wed Feb 16, 2022 7:15 pm
- City: Milwaukie
- State: OR
Re: 68 Camper Special Instrument rehab
The original wire suppling 12 volts to the fuel gauge was connected directly to the buss bar on the back of the ammeter so that the buss bar was still powered up with switched 12 volts when the key is on.
Re: 68 Camper Special Instrument rehab
nice where did you find the voltage reg and heat sink
-
Wildergarten
- Sweptline.ORG Pioneer

- Posts: 1768
- Joined: Wed Mar 21, 2018 5:27 pm
- City: Los Gatos
- State: CA
- Contact:
Re: 68 Camper Special Instrument rehab
I have had an instance in which the riveted electrical connection between the buss bar and the strap to which it is connected had failed. I ended up soldering it.Conductorblg wrote: ↑Sun Sep 11, 2022 1:38 amThe original wire suppling 12 volts to the fuel gauge was connected directly to the buss bar on the back of the ammeter so that the buss bar was still powered up with switched 12 volts when the key is on.
'69 W200 (thumbnail)
'68 W200 (RIP)
'68 W200 383 NP435 3.53
'67 W200 383 NP435 4.10 w overload springs, Dana 60, PTO winch & flatbed dump, racks, crane, c-air (Max)
Mark Vande Pol
Wildergarten.org
'68 W200 (RIP)
'68 W200 383 NP435 3.53
'67 W200 383 NP435 4.10 w overload springs, Dana 60, PTO winch & flatbed dump, racks, crane, c-air (Max)
Mark Vande Pol
Wildergarten.org
-
martincom

- Sweptline.ORG Member

- Posts: 448
- Joined: Thu Jul 30, 2020 10:04 am
- City: Five Points
- State: AL
Re: 68 Camper Special Instrument rehab
I had done near the identical modification. I included source links for the materials utilized:
viewtopic.php?f=21&t=43914
1*1971 D100 318 A/T
1*1970 Charger R/T 440-6PK A/T
2*1969 Daytona Charger 440 A/T
1*1969 Coronet R/T awaiting restoration
1*1969 Torino Talladega awaiting restoration
1*1970 Charger R/T 440-6PK A/T
2*1969 Daytona Charger 440 A/T
1*1969 Coronet R/T awaiting restoration
1*1969 Torino Talladega awaiting restoration
-
Conductorblg
- Sweptline.ORG Member
- Posts: 41
- Joined: Wed Feb 16, 2022 7:15 pm
- City: Milwaukie
- State: OR
Re: 68 Camper Special Instrument rehab
Thanks for suppling the electronic voltage regulator parts info for others. I'm on vacation at the daughter's house in SoCal and don't have the info in my laptop.
Re: 68 Camper Special Instrument rehab
sure i now where near that far on my truck ,but hopefully some day

Re: 68 Camper Special Instrument rehab
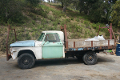
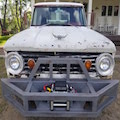
Found this post while researching for a Painless rewire on a 68 Dodge W200. Old Forest Service truck that has a Braden PTO winch - 318 engine (rebuilt) ... pretty much a down to the frame restoration.
The cluster is very similar to the one in this post, but it has an oil light, not a pressure line gauge.
I have a second 67 W200 Shortbed that I added a set of after market gauges (electric oil, voltmeter, temperature dial) mounted to the bottom of the dash. This gives me a bit more accuracy (in my mind) and deals with the ammeter and oil pressure leak issues ... but they are not as easy to read as the cluster.
Am hoping to modify the cluster on the 68 to accept a voltmeter where the ammeter is located and reuse the oil idiot light or replace with an electric gauge. I also want to add a tachometer on the column like in this post
Questions:
1. Assume the oil light I have was hooked to an electric sensor (now gone after the rebuild). Can anyone give me any info on that? Has anyone found an electric oil pressure gauge that I could fit into the cluster that has a similar style (so I do not have to adjust the cover plate?
2. Has anyone replaced a pressure line gauge with an electric one that has a style that fits the cluster with a compatible electric sensor?
3. Has anyone replaced the ammeter with a voltmeter style gauge that fits this cluster? Have found one from a late 60's Camaro online that looks like it might work, but cannot get the dimension specs/might have to trim
4, Any suggestions on what type of column tach to add?
Thanks
The cluster is very similar to the one in this post, but it has an oil light, not a pressure line gauge.
- G6ClusterFull.jpeg (29.26 KiB) Viewed 1217 times
- 68_ClusterOilLight1000PX.png (233.42 KiB) Viewed 1217 times
Am hoping to modify the cluster on the 68 to accept a voltmeter where the ammeter is located and reuse the oil idiot light or replace with an electric gauge. I also want to add a tachometer on the column like in this post
Questions:
1. Assume the oil light I have was hooked to an electric sensor (now gone after the rebuild). Can anyone give me any info on that? Has anyone found an electric oil pressure gauge that I could fit into the cluster that has a similar style (so I do not have to adjust the cover plate?
2. Has anyone replaced a pressure line gauge with an electric one that has a style that fits the cluster with a compatible electric sensor?
3. Has anyone replaced the ammeter with a voltmeter style gauge that fits this cluster? Have found one from a late 60's Camaro online that looks like it might work, but cannot get the dimension specs/might have to trim
- camaro.jpeg (14.29 KiB) Viewed 1217 times
Thanks
-
PwrWgnDrvr
- Sweptline.ORG Pioneer
- Posts: 7362
- Joined: Wed Dec 31, 1969 6:00 pm
- Location: Walnut Creek, CA
Re: 68 Camper Special Instrument rehab
The sensor screws into a 1/8" NPT port on the top of the block right next to the distributor. Same place a pressure line would be attached.
-
martincom
- Sweptline.ORG Member
- Posts: 448
- Joined: Thu Jul 30, 2020 10:04 am
- City: Five Points
- State: AL
Re: 68 Camper Special Instrument rehab
2. Has anyone replaced a pressure line gauge with an electric one that has a style that fits the cluster with a compatible electric sensor?
The 69 - 71 standard instrument cluster included the oil light, but it was an option for a electronic gauge that fit in the same cluster. This gauge may fit into your cluster with some trimming. It may not center with the other gauges Likewise some passenger car gauges of the same era may fit. I don't know of anything off-the-shelf that will drop in.
You may want to consider going the "heavy duty" gauge option or a fabrication similar. A fellow on the sweptline.org Facebook group is offering a complete heavy duty cluster, less the tachometer, that I'm assuming he fabricated as the factory optional heavy duty gauges included the tachometer. See his page: https://www.facebook.com/groups/9854660 ... 6314524004
You may want to take it a step further and just fabricate your own. I believe the panel is flat and will mate over the existing cluster opening. Once you have the flat panel, you can mount aftermarket gauges into it. I believe Wildergarten is doing this and he had posted some images of panel templates he had mocked up, with some adding even more openings for additional gauges, such as vacuum. I'd suggest you reach out to him via PM.
3. Has anyone replaced the ammeter with a voltmeter style gauge that fits this cluster? Have found one from a late 60's Camaro online that looks like it might work, but cannot get the dimension specs/might have to trim.
The factory amp meter is actually fairly robust. The issue is the wiring and definitely the bulkhead connector. Upsizing or adding parallel conductors will resolve the wiring issue. Bypassing or expanding the bulkhead connections will resolve it. Here is the link to how I addressed this in my '71 D100:
https://www.sweptline.org/forums/viewto ... ng#p312441
1*1971 D100 318 A/T
1*1970 Charger R/T 440-6PK A/T
2*1969 Daytona Charger 440 A/T
1*1969 Coronet R/T awaiting restoration
1*1969 Torino Talladega awaiting restoration
1*1970 Charger R/T 440-6PK A/T
2*1969 Daytona Charger 440 A/T
1*1969 Coronet R/T awaiting restoration
1*1969 Torino Talladega awaiting restoration
-
martincom
- Sweptline.ORG Member
- Posts: 448
- Joined: Thu Jul 30, 2020 10:04 am
- City: Five Points
- State: AL
Re: 68 Camper Special Instrument rehab
Here is a photo of the 69 - 71 standard instrument cluster with the optional oil pressure gauge:
1*1971 D100 318 A/T
1*1970 Charger R/T 440-6PK A/T
2*1969 Daytona Charger 440 A/T
1*1969 Coronet R/T awaiting restoration
1*1969 Torino Talladega awaiting restoration
1*1970 Charger R/T 440-6PK A/T
2*1969 Daytona Charger 440 A/T
1*1969 Coronet R/T awaiting restoration
1*1969 Torino Talladega awaiting restoration
-
Wildergarten
- Sweptline.ORG Pioneer
- Posts: 1768
- Joined: Wed Mar 21, 2018 5:27 pm
- City: Los Gatos
- State: CA
- Contact:
Re: 68 Camper Special Instrument rehab
I actually bought a new sender for that electric gauge to put in my project truck because I prefer that to sending a hose under pressure through the firewall (we have active wood rats here with a taste for rubber). If I recall correctly, the '69 went to etched glass on the panel instead of labels on the gauges, so I also got a set of '68 decals from Whitegauges to put on the face of the '69 gauge in a '68 panel. If I end up replacing the whole panel for round gauges with a tach, I may put the "kit" up for sale.
'69 W200 (thumbnail)
'68 W200 (RIP)
'68 W200 383 NP435 3.53
'67 W200 383 NP435 4.10 w overload springs, Dana 60, PTO winch & flatbed dump, racks, crane, c-air (Max)
Mark Vande Pol
Wildergarten.org
'68 W200 (RIP)
'68 W200 383 NP435 3.53
'67 W200 383 NP435 4.10 w overload springs, Dana 60, PTO winch & flatbed dump, racks, crane, c-air (Max)
Mark Vande Pol
Wildergarten.org
Re: 68 Camper Special Instrument rehab
Appreciate all the input.
Will spend some time looking for the heavy duty cluster and exploring the 69/71 option.
Main concern is to have the sensors in place so I can get the engine functional to safely run in a monitored fashion. So I can move it in and out of the shop under its own power.
Re electric oil sensor -
Assumed any gauge I got would come with a sensor that matched to be installed on the engine. Think I saw a post a while back about a member wanting to add a gauge and preserve his idiot light as well. Have been giving some thought to doing the same thing. Think the suggestion was to "T" into the line. Wonder if that means to just splice in ... and how that works with the sensor?
Re ammeter -
Appreciate the feedback but it is going. Rebuilt a 72 Valiant with a 225 Slant 6 with our daughter. Drove it cross country to Carlisle for the big Mopar show. Ended up having an issue withe the ammeter gauge and had to take it out of line. Issue happened in a good spot/time. Would have been a pain if it was out on the road.
-
Wildergarten
- Sweptline.ORG Pioneer
- Posts: 1768
- Joined: Wed Mar 21, 2018 5:27 pm
- City: Los Gatos
- State: CA
- Contact:
Re: 68 Camper Special Instrument rehab
Yes, put a 1/8NPT nipple into the block and screw on a 18NPT tee. That allows one to add both the sensor and the idiot light switch into the tee. The nipple needs to be long enough to allow the gauge sender to rotate (mine was 2"). If you want that setup to take less space, you might try a couple of elbows into the tee so that the two sensors can be pointed upright. BUT, check to see if the installation vibrates. If it does, you may need a schedule 80 nipple stiff enough to dampen it.
'69 W200 (thumbnail)
'68 W200 (RIP)
'68 W200 383 NP435 3.53
'67 W200 383 NP435 4.10 w overload springs, Dana 60, PTO winch & flatbed dump, racks, crane, c-air (Max)
Mark Vande Pol
Wildergarten.org
'68 W200 (RIP)
'68 W200 383 NP435 3.53
'67 W200 383 NP435 4.10 w overload springs, Dana 60, PTO winch & flatbed dump, racks, crane, c-air (Max)
Mark Vande Pol
Wildergarten.org
-
PwrWgnDrvr
- Sweptline.ORG Pioneer
- Posts: 7362
- Joined: Wed Dec 31, 1969 6:00 pm
- Location: Walnut Creek, CA
Re: 68 Camper Special Instrument rehab
Those are one and the same. The other line into the T is a tube that transmits oil under pressure to the pressure gauge itself.Wildergarten wrote: ↑Sat Dec 31, 2022 11:40 am...That allows one to add both the sensor and the idiot light switch into the tee.....
-
Wildergarten
- Sweptline.ORG Pioneer
- Posts: 1768
- Joined: Wed Mar 21, 2018 5:27 pm
- City: Los Gatos
- State: CA
- Contact:
Re: 68 Camper Special Instrument rehab
Not with an electric gauge, which is what my '69 had in the factory dash. The idiot light switch is about an inch in diameter. The oil pressure gauge sender from my '69 is at least twice the size. I bought a spare gauge sender as a Dodge part of that vintage on eBay last year. If you want photos I'll post them.PwrWgnDrvr wrote: ↑Sat Dec 31, 2022 12:09 pmThose are one and the same. The other line into the T is a tube that transmits oil under pressure to the pressure gauge itself.Wildergarten wrote: ↑Sat Dec 31, 2022 11:40 am...That allows one to add both the sensor and the idiot light switch into the tee.....
'69 W200 (thumbnail)
'68 W200 (RIP)
'68 W200 383 NP435 3.53
'67 W200 383 NP435 4.10 w overload springs, Dana 60, PTO winch & flatbed dump, racks, crane, c-air (Max)
Mark Vande Pol
Wildergarten.org
'68 W200 (RIP)
'68 W200 383 NP435 3.53
'67 W200 383 NP435 4.10 w overload springs, Dana 60, PTO winch & flatbed dump, racks, crane, c-air (Max)
Mark Vande Pol
Wildergarten.org