Motor compartment wiring + Pertronix gizmos + air gap
Posted: Tue Nov 08, 2016 8:38 pm
I'm back.
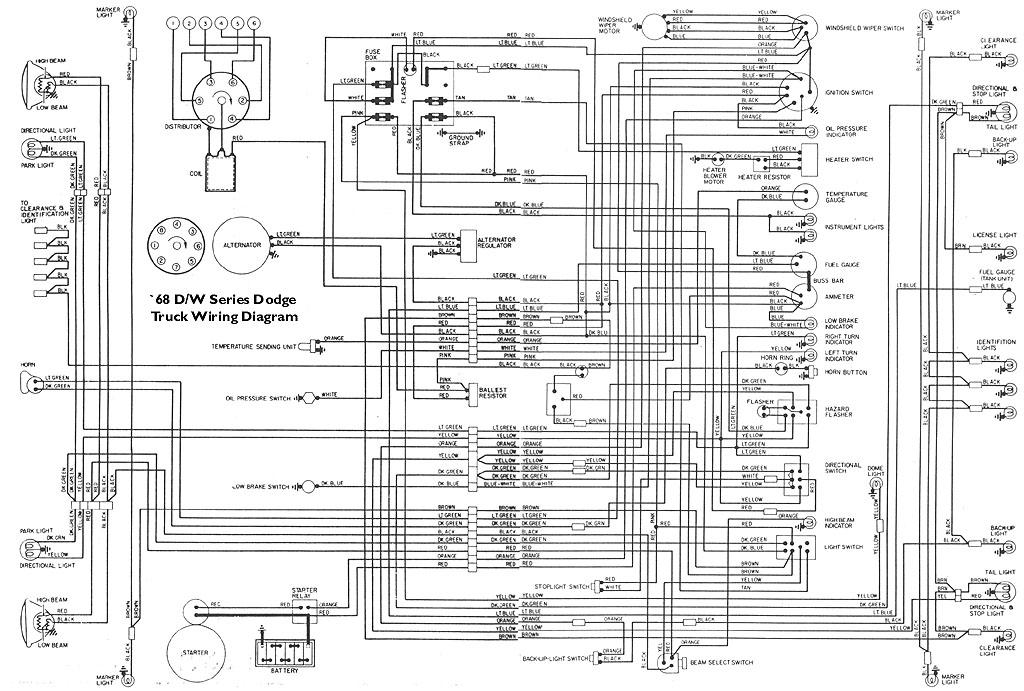
Fuses seems to be fine so now it's on to other wiring gremlins. I just put in Pertronix Flame Thrower coil (1.5ohm) and Ignitor (to replace points and condenser). Also just put in new alternator and cap. There is so much legacy wiring, splices, wires to nowhere and mystery components so I'm basically pulling a lot of the old wires out of the motor area to start from scratch. Currently from the alternator a green wires goes to alternator regulator, which connects to a black ignition wire. I want to remove the alternator regulator and just connect the ignition wire to the alternator, that should be fine right? Basically delete the old-school alternator regulator all together. #2 I'm also deleting the ballast resistor because the Pertronix says it is not needed with their system and nothing else connects to it.
Alternator:
Black wire from ignition splices with green wire to alternator (Field plug on alternator). Then big black wire from alternator post to ???
Pertronix Ignitor:
Black wire to neg on coil, red wire to pos on coil. Pink wire from ignition switch also to pos terminal on coil
Basically, no ballast resistor and no alternator regulator. Pertronix coil and in the distributor, no points or condensor. Does anybody see any red flags with this???
Section two of this thread:
When I turned the key the spark was strong and immediate but I only got one pop each time while cranking it. If I kept giving it gas I would get a big backfire through the carb. I can't adjust the timing because I cant get it to run. I've seen a couple threads mention "Air Gap". I probably need to adjust this with my Pertronix ignitor. How the hell do I do this? I'm learning a lot through these trials and errors but at this point I could use some help getting alternator, coil, distrubutor and ignition all correctly wired. Any takers on this?
Thanks,
Tom