
Disc Brake Upgrade Under Way
-
Gruney1
- Sweptline.ORG Member

- Posts: 32
- Joined: Wed Dec 31, 1969 6:00 pm
- Location: North Georgia
- Contact:
Disc Brake Upgrade Under Way
Received my mounting plates from Tallzag a few days ago, they look great! I started dismantling the drum brakes on my 65 D100 Utiline yesterday. I will try and post some pictures when I have some. So far all the parts that Tom lists are working out well. I also am putting a dual master cylinder on it. Bought most of the parts from Auto Zone, and I am into it for just over $300.00 total. I do have to drill the lower mounting holes one size bigger, but not a big deal.
-
Gruney1
- Sweptline.ORG Member
- Posts: 32
- Joined: Wed Dec 31, 1969 6:00 pm
- Location: North Georgia
- Contact:
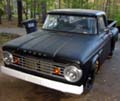
It is a late 65 with the single headlight on each side. Those bolts were a b#*%& to get out! I broke my Craftsman 1/2" drive breaker bar! 2 nights of hammering, heating, spraying WD40, and cussing. I destroyed the drum brake backing plate. Now I have to get the passenger side loose! Yippee!tallzag wrote:You have a 65? We are trying to figure out what year they changed the lower bolts.
BTW, where can I get a proportioning valve (splitter) to install the Dual master cylinder?
Thanks for your help. I will answer any questions as I venture forward.
Ken
-
tallzag
These guys sell stock style ones:
http://www.inlinetube.com/
If you don't care about the stock look Wilwood makes an adjustable one that works great, and that way you can dial it in.
http://www.inlinetube.com/
If you don't care about the stock look Wilwood makes an adjustable one that works great, and that way you can dial it in.

I have the Tallzag setup on my 67 D100 shortbed. I found that I didnt need to use a proportioning valve with my setup.... I had a new willwood adjustable style pro/valve...but the brakes work great without it so dont see the reason to put it on. I dont have the part number on me this second but i used a disk/drum master cylinder from napa thats the 4 hole mount 1 1/8 inch bore "I think" It was a part number for 72-78 dodge truck/vans/and some cars...fits all kinds of applications...if anyone needs the part number i can look it up in my notebook in the garage..this master cylinder is a perfect match for our trucks weight bias
-
Gruney1
- Sweptline.ORG Member
- Posts: 32
- Joined: Wed Dec 31, 1969 6:00 pm
- Location: North Georgia
- Contact:
2 questions for you Cliff:
1. Did you use the stock splitter and hard lines to separate the Left and Right front brakes?
2. Which section of the dual master is for the front? I bought a master for a 72 D100 with manual disc brakes.
I will try it without the proportioning valve, and sell it on Ebay if I don't need it.
Thanks for the help!
Hey Gruney1 If you give me a name and number to reach you Ill give you a call and we can talk specifics of how i did my work....It was all real easy and worth doing thats for sure! oh and a good time to call would be great...CliffGruney1 wrote:2 questions for you Cliff:
1. Did you use the stock splitter and hard lines to separate the Left and Right front brakes?
2. Which section of the dual master is for the front? I bought a master for a 72 D100 with manual disc brakes.
I will try it without the proportioning valve, and sell it on Ebay if I don't need it.
Thanks for the help!


-
exline

- Sweptline.ORG Member

- Posts: 219
- Joined: Wed Dec 31, 1969 6:00 pm
- City: warfordsburg
- State: PA
- Location: PA
- Contact:
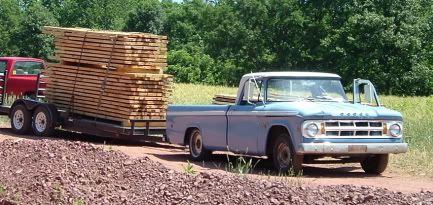
I do work my truck . here is a picture of me coming back from vacation this summer , i blew a tire along the interstate .
The brakes suck so bad that they get hot puling this pop up camper down a hill ! I just about crashed pulling my box trailer scared the crap out of me! I got trailer brakes now but it still iisint good with 4 wheel drums.
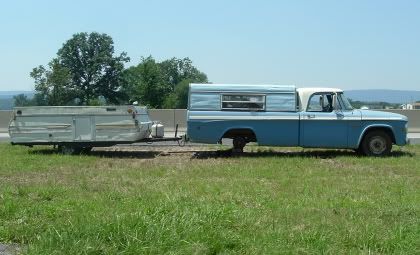
The brakes suck so bad that they get hot puling this pop up camper down a hill ! I just about crashed pulling my box trailer scared the crap out of me! I got trailer brakes now but it still iisint good with 4 wheel drums.
Hey Ken,
Use the search engine on this forum and put in " tallzag" Everything that shows up on the page with me "Cliff" and "Tallzag" as authors you need to read all my post on all the topics with our names as the autors... theres like 5 or 6 of them.
Also if you would like to see some pics...here you go


the reason the master cylinder looks so shity is I forgot to bench bleed it before I mounted the damn thing. I made a huge mess after I tried to do it mounted up and and brake fluid took off alot of fresh paint! The master cylinder Napa part # 10-1572. I did have to replace hard lines going from spliter block over to each wheel, to the frame where the rubber line clips to frame. The rear reservoir is for the front brakes I think.
any other questions just give me a shout....Ill try to call you tomorrow also...later...Cliff
Use the search engine on this forum and put in " tallzag" Everything that shows up on the page with me "Cliff" and "Tallzag" as authors you need to read all my post on all the topics with our names as the autors... theres like 5 or 6 of them.
Also if you would like to see some pics...here you go
the reason the master cylinder looks so shity is I forgot to bench bleed it before I mounted the damn thing. I made a huge mess after I tried to do it mounted up and and brake fluid took off alot of fresh paint! The master cylinder Napa part # 10-1572. I did have to replace hard lines going from spliter block over to each wheel, to the frame where the rubber line clips to frame. The rear reservoir is for the front brakes I think.
any other questions just give me a shout....Ill try to call you tomorrow also...later...Cliff
-
Gruney1
- Sweptline.ORG Member
- Posts: 32
- Joined: Wed Dec 31, 1969 6:00 pm
- Location: North Georgia
- Contact:
Thanks for sharing those pictures! I am anxious to finish, but:
1. the weather's been rainy for the past 3 nights,
2. we're having company this weekend, so I don't know if I'll get a chance to work on it then. I'll have to sneak out when they're not looking.
3. My son's birthday is 12/5
4. My wife's birthday is 12/14
5. Then there's the business trip from 12/10-12/17 in Orlando
6. the Mother-in-law comes to town from Chicago from 12/17-12/21, so I have to play nice during that time.
7. don't forget Santa, we're going to Alabama (4 hr drive) for that weekend
8. New Year's weekend is another trip to Alabama for the weekend.
So it's not looking good for brakes in 2006...
Thanks for reading my excuse list.
The Dorman Part # for the wheel studs is 610-103.1 @ $1.49 each from Autozone. Get all RH studs, so future problems will be avoided. I will change the left rear studs when I get the chance. (maybe 2008). Autozone seemed to have the best prices for the parts, and most were in stock. The worst part is having to pay for cores on the calipers and master cylinder. (which I won't get back) It was about $320 for everything so far. (All new parts). If you go to Autozone.com, you can look up all the parts before you get there to make sure they get you the correct parts. It also lets you see the different brands and options you have ahead of time. They will try to upsell you to the higher priced stuff with longer warranties. Just say no!
As far as drilling the hubs, they fit perfect without any modifications.
Hope this helps.


-
Roger

- Sweptline.ORG Member
- Posts: 511
- Joined: Wed Dec 31, 1969 6:00 pm
- City: Loganville GA
- State: GA
- Location: Loganville Ga
I have tightened up the race seat (if its close) by taking a punch and punching all the way around the inside of the hub on the race seat as many times as I could, probably 50-60 times as you put a punch mark in the hub, the metal raises up around the holes, much like a volcano. thus making the seat tighten up and hold the bearing race tight. I hope this helps.
Roger, '65 4 eyed short bed.